Quick Start (Swift)
Supported Environment
Minimum supported iOS version is
11.0Minimum supported device is
iPhone 6sSwiftandObjective-Care supported.Camera permissionandNetwork connected environmentare required.Running GazeTracker on simulator is not supported.
SeeSo SDK uses the front camera of the device
Sample Project
Please go to the sample project page for the purpose of using it rather than implementing it.
Environment Set-ups
Append SDK to the project
Drag & drop downloaded SeeSo.xcframework file to the project.
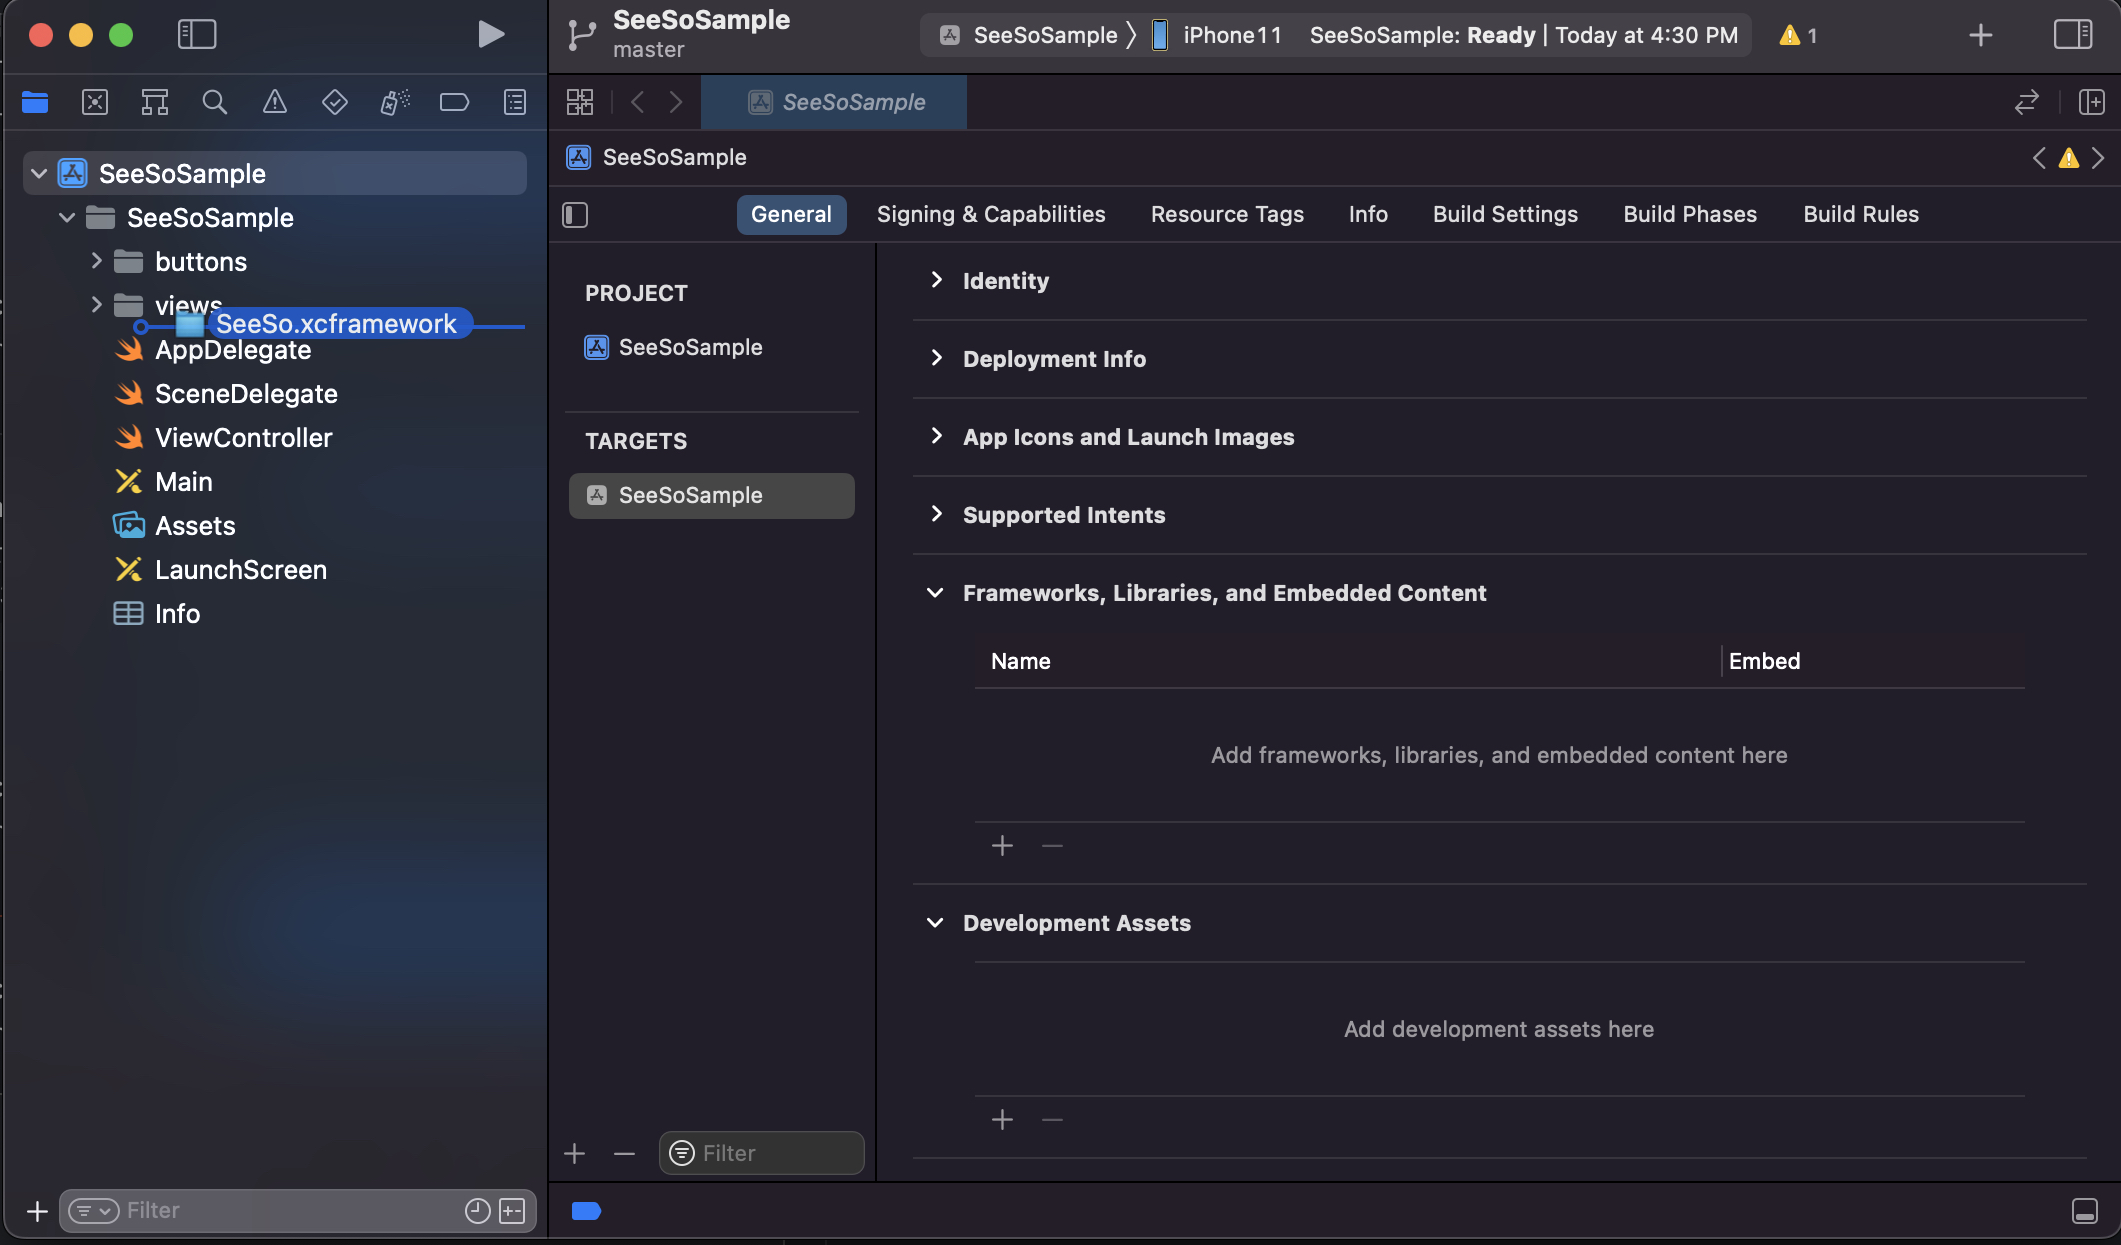
Check the 'Copy items if needed' option. Then, select the [Added folders > Create groups] and click the finish button.
Check if the SeeSo.xcframework has been appended at the navigator list on the left side.
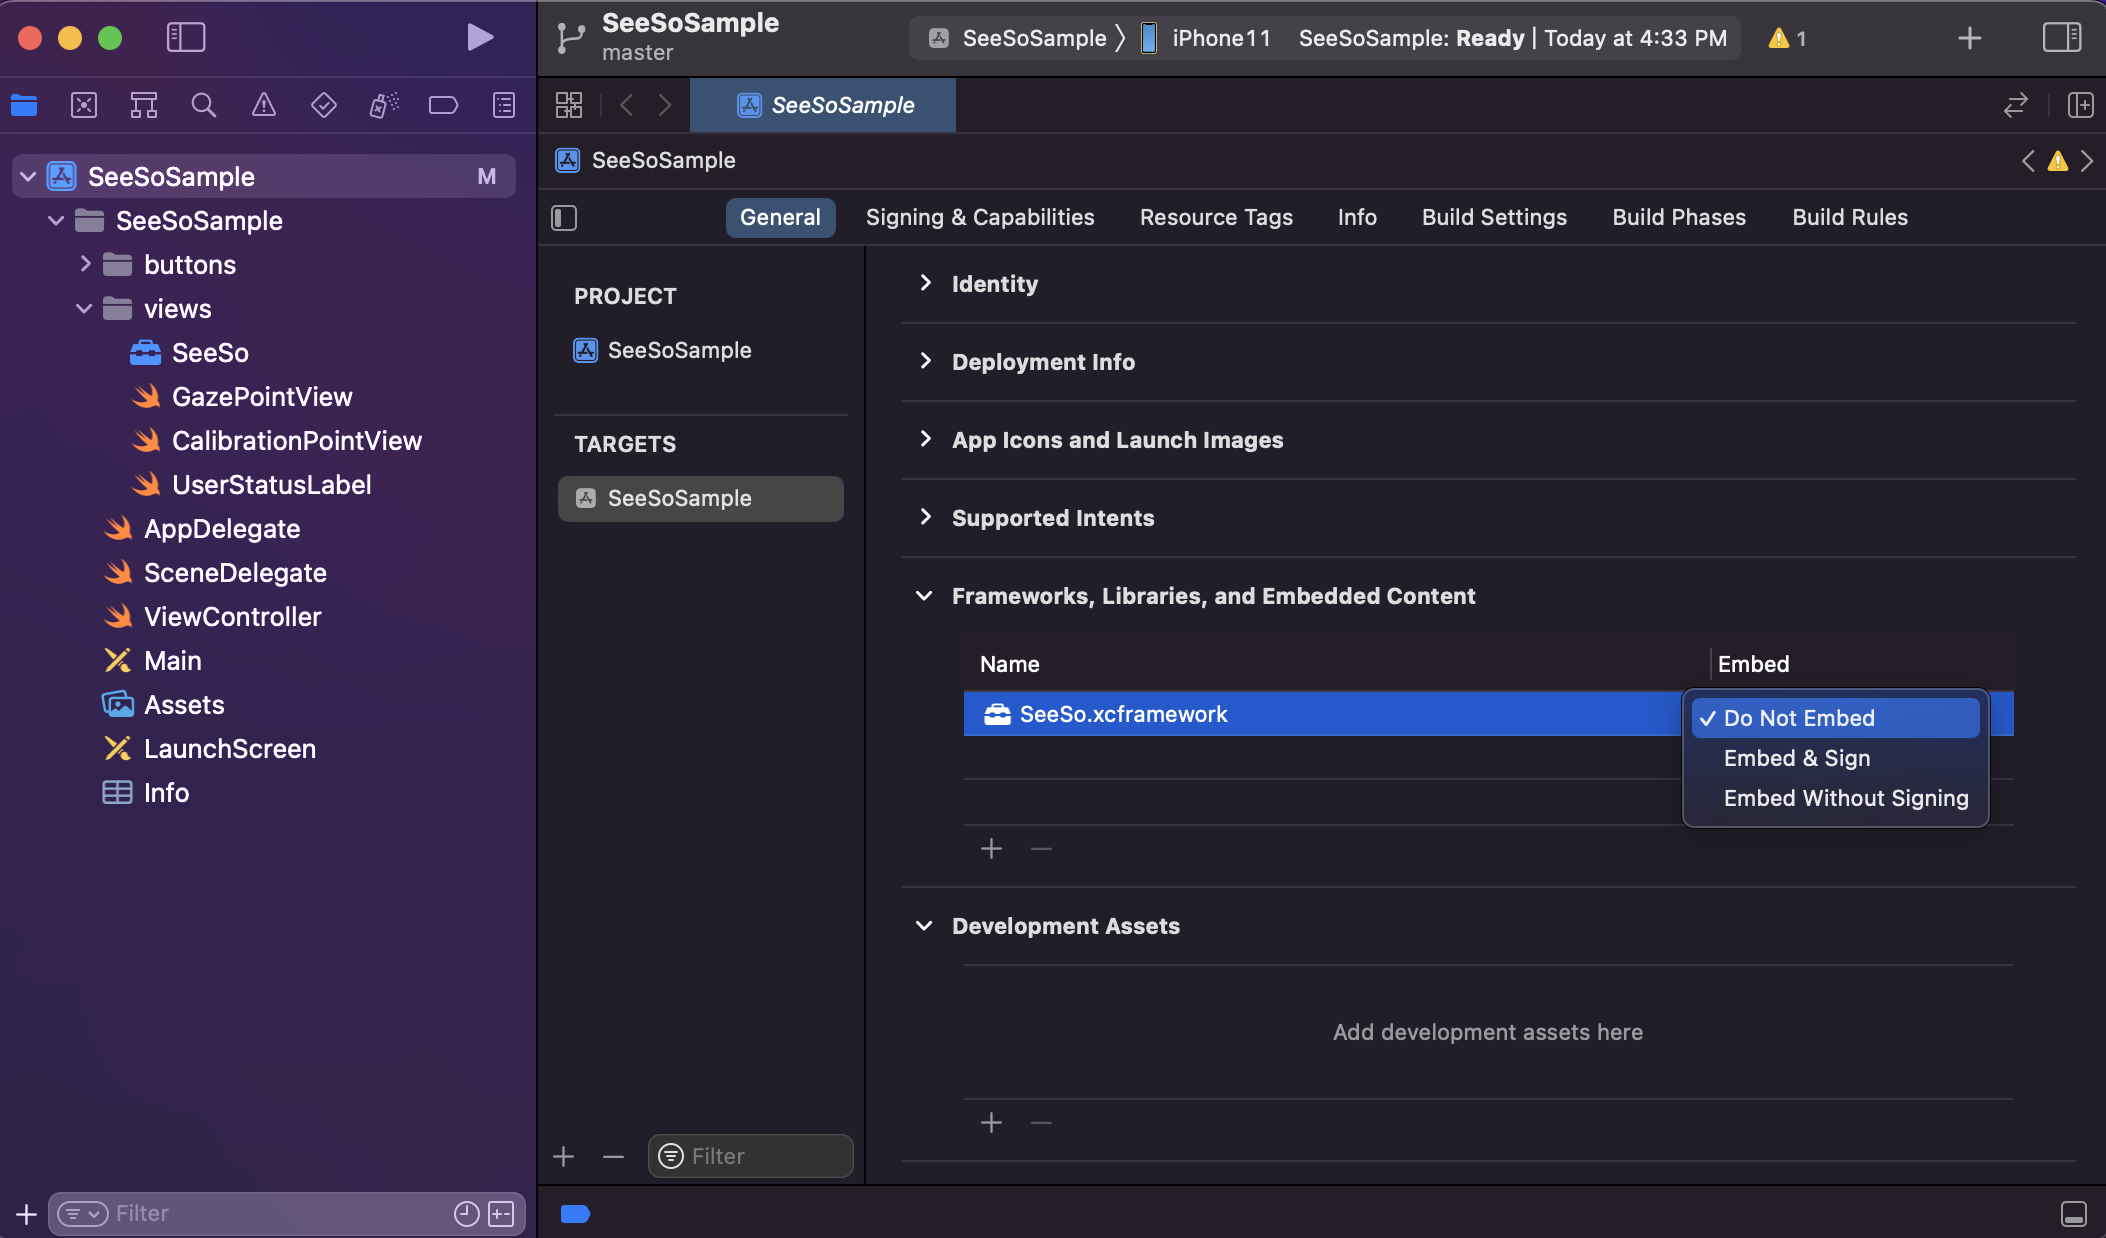
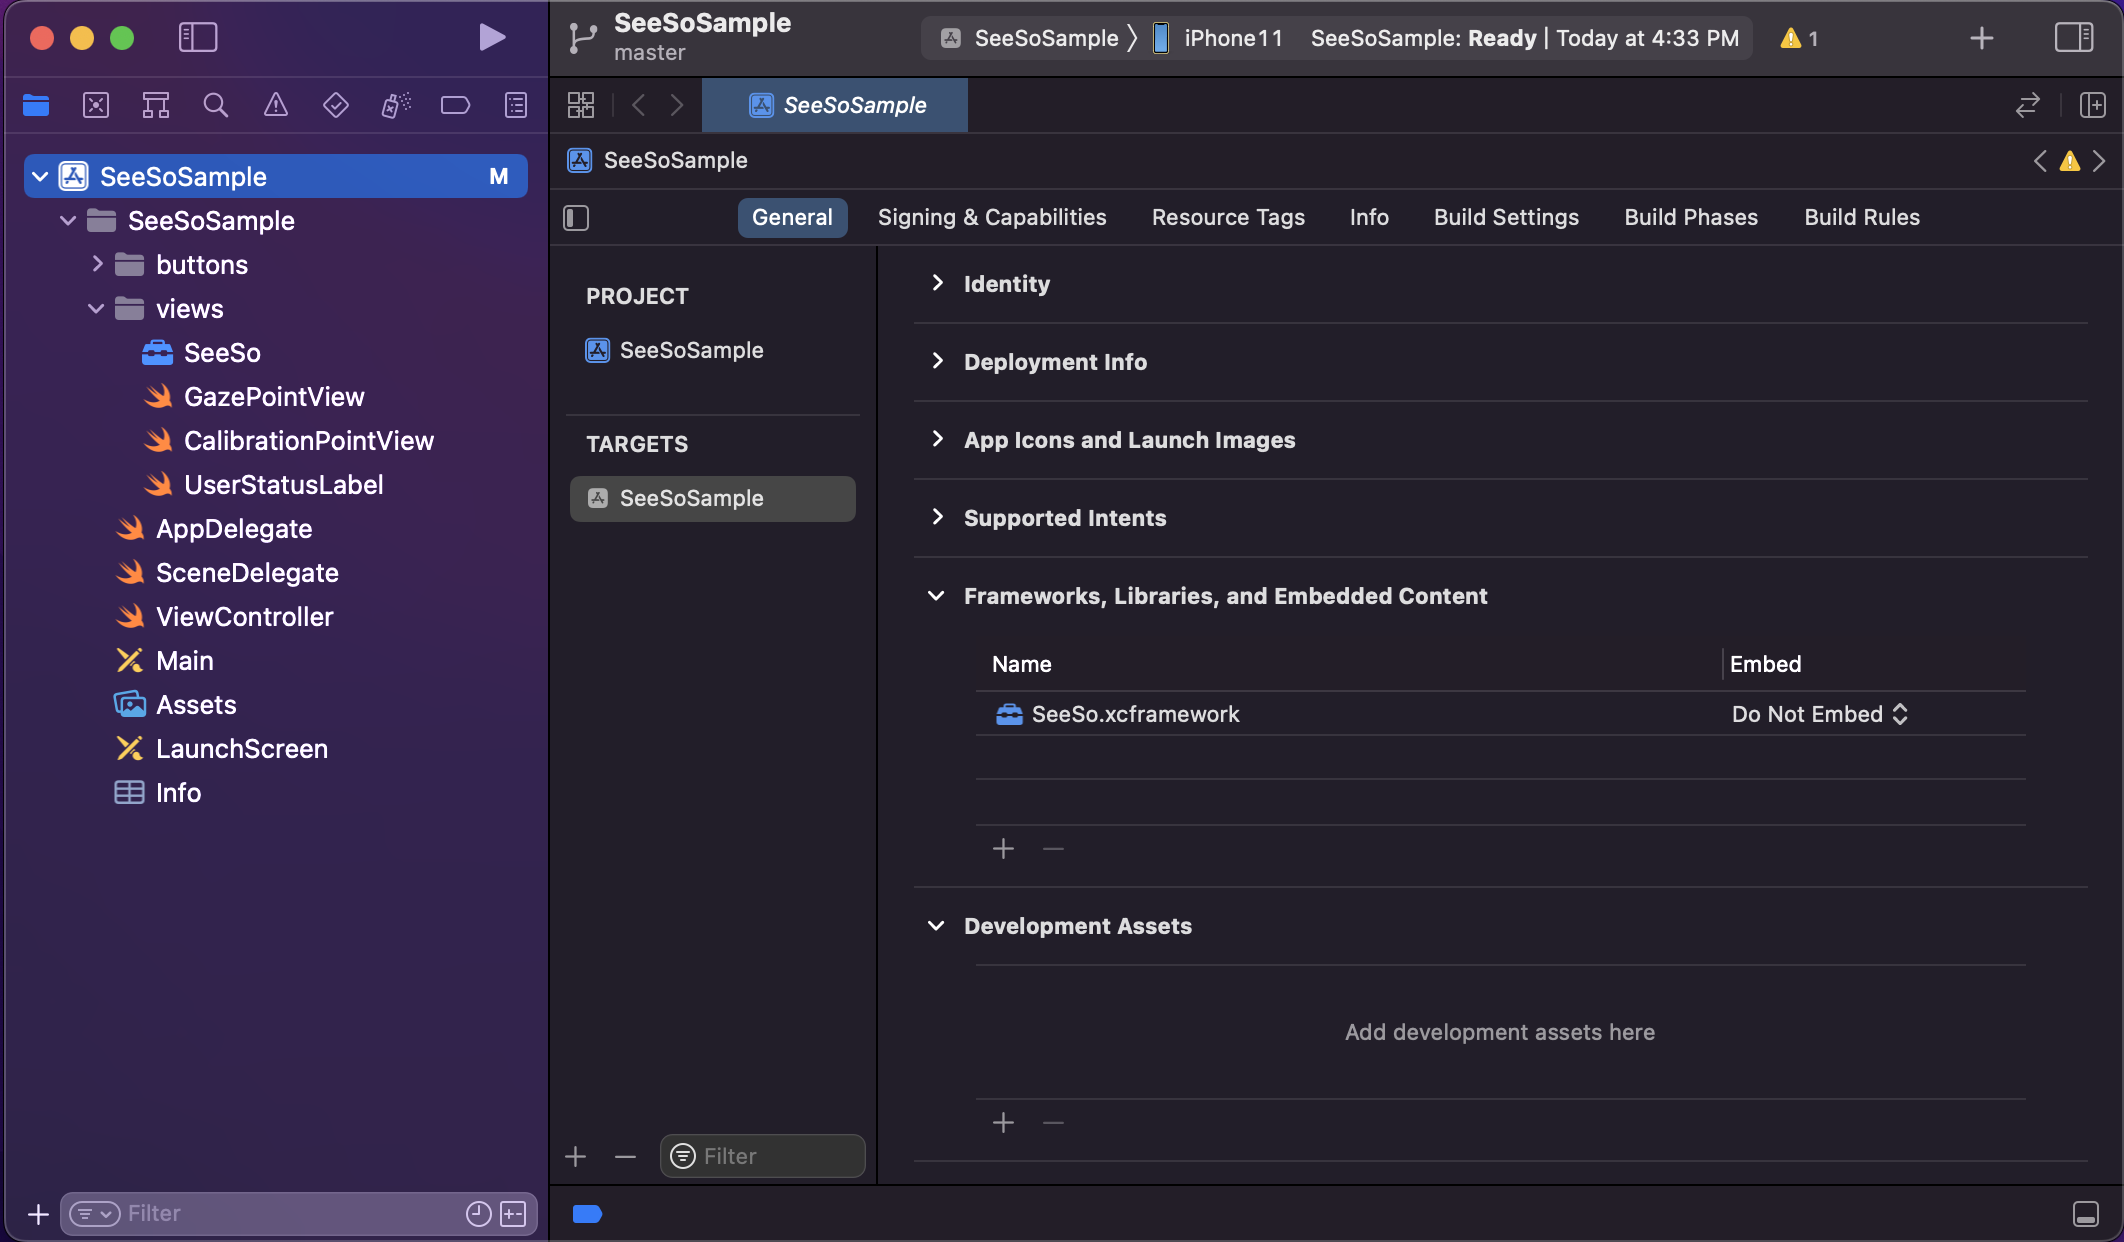
Change option 'Do Not Embed' of [Frameworks, Libraries, and Embedded Content > SeeSo.framework] to 'Embed & sign'.
Camera permission
Move to [General > Info].
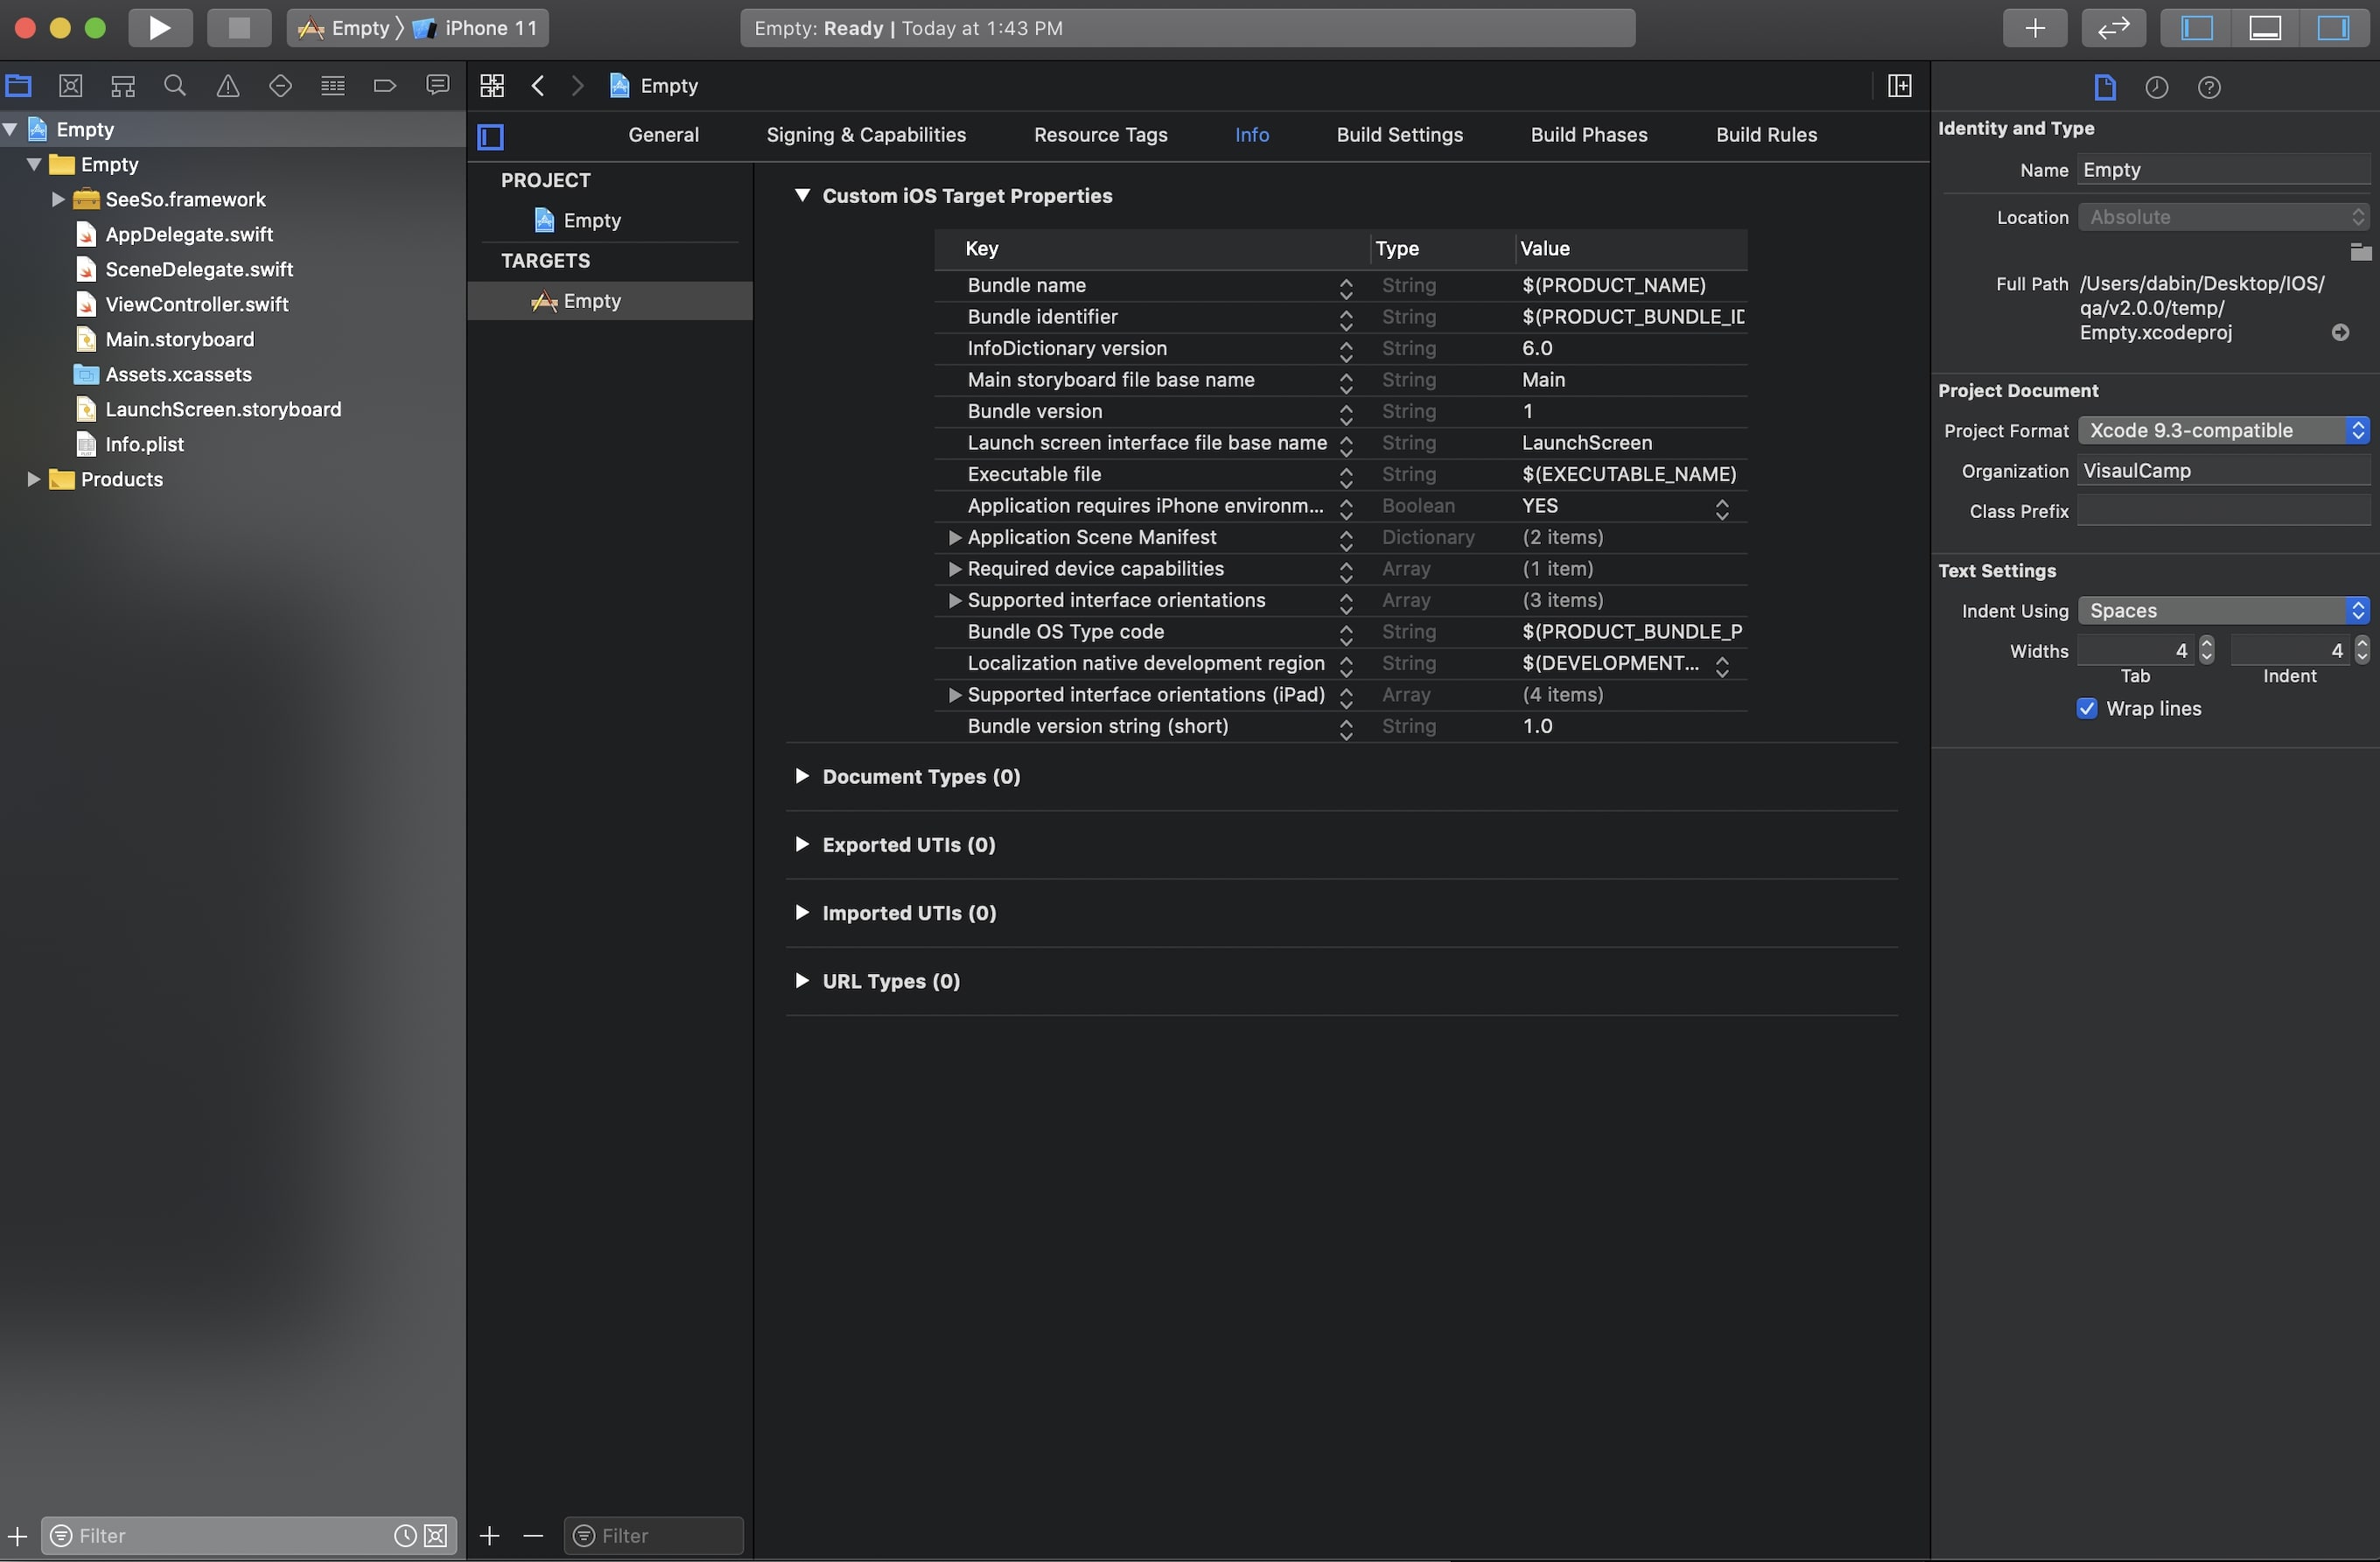
Click '+' button in [Custom iOS Target Properties] table. The button will appear when
hoveringthe mouse.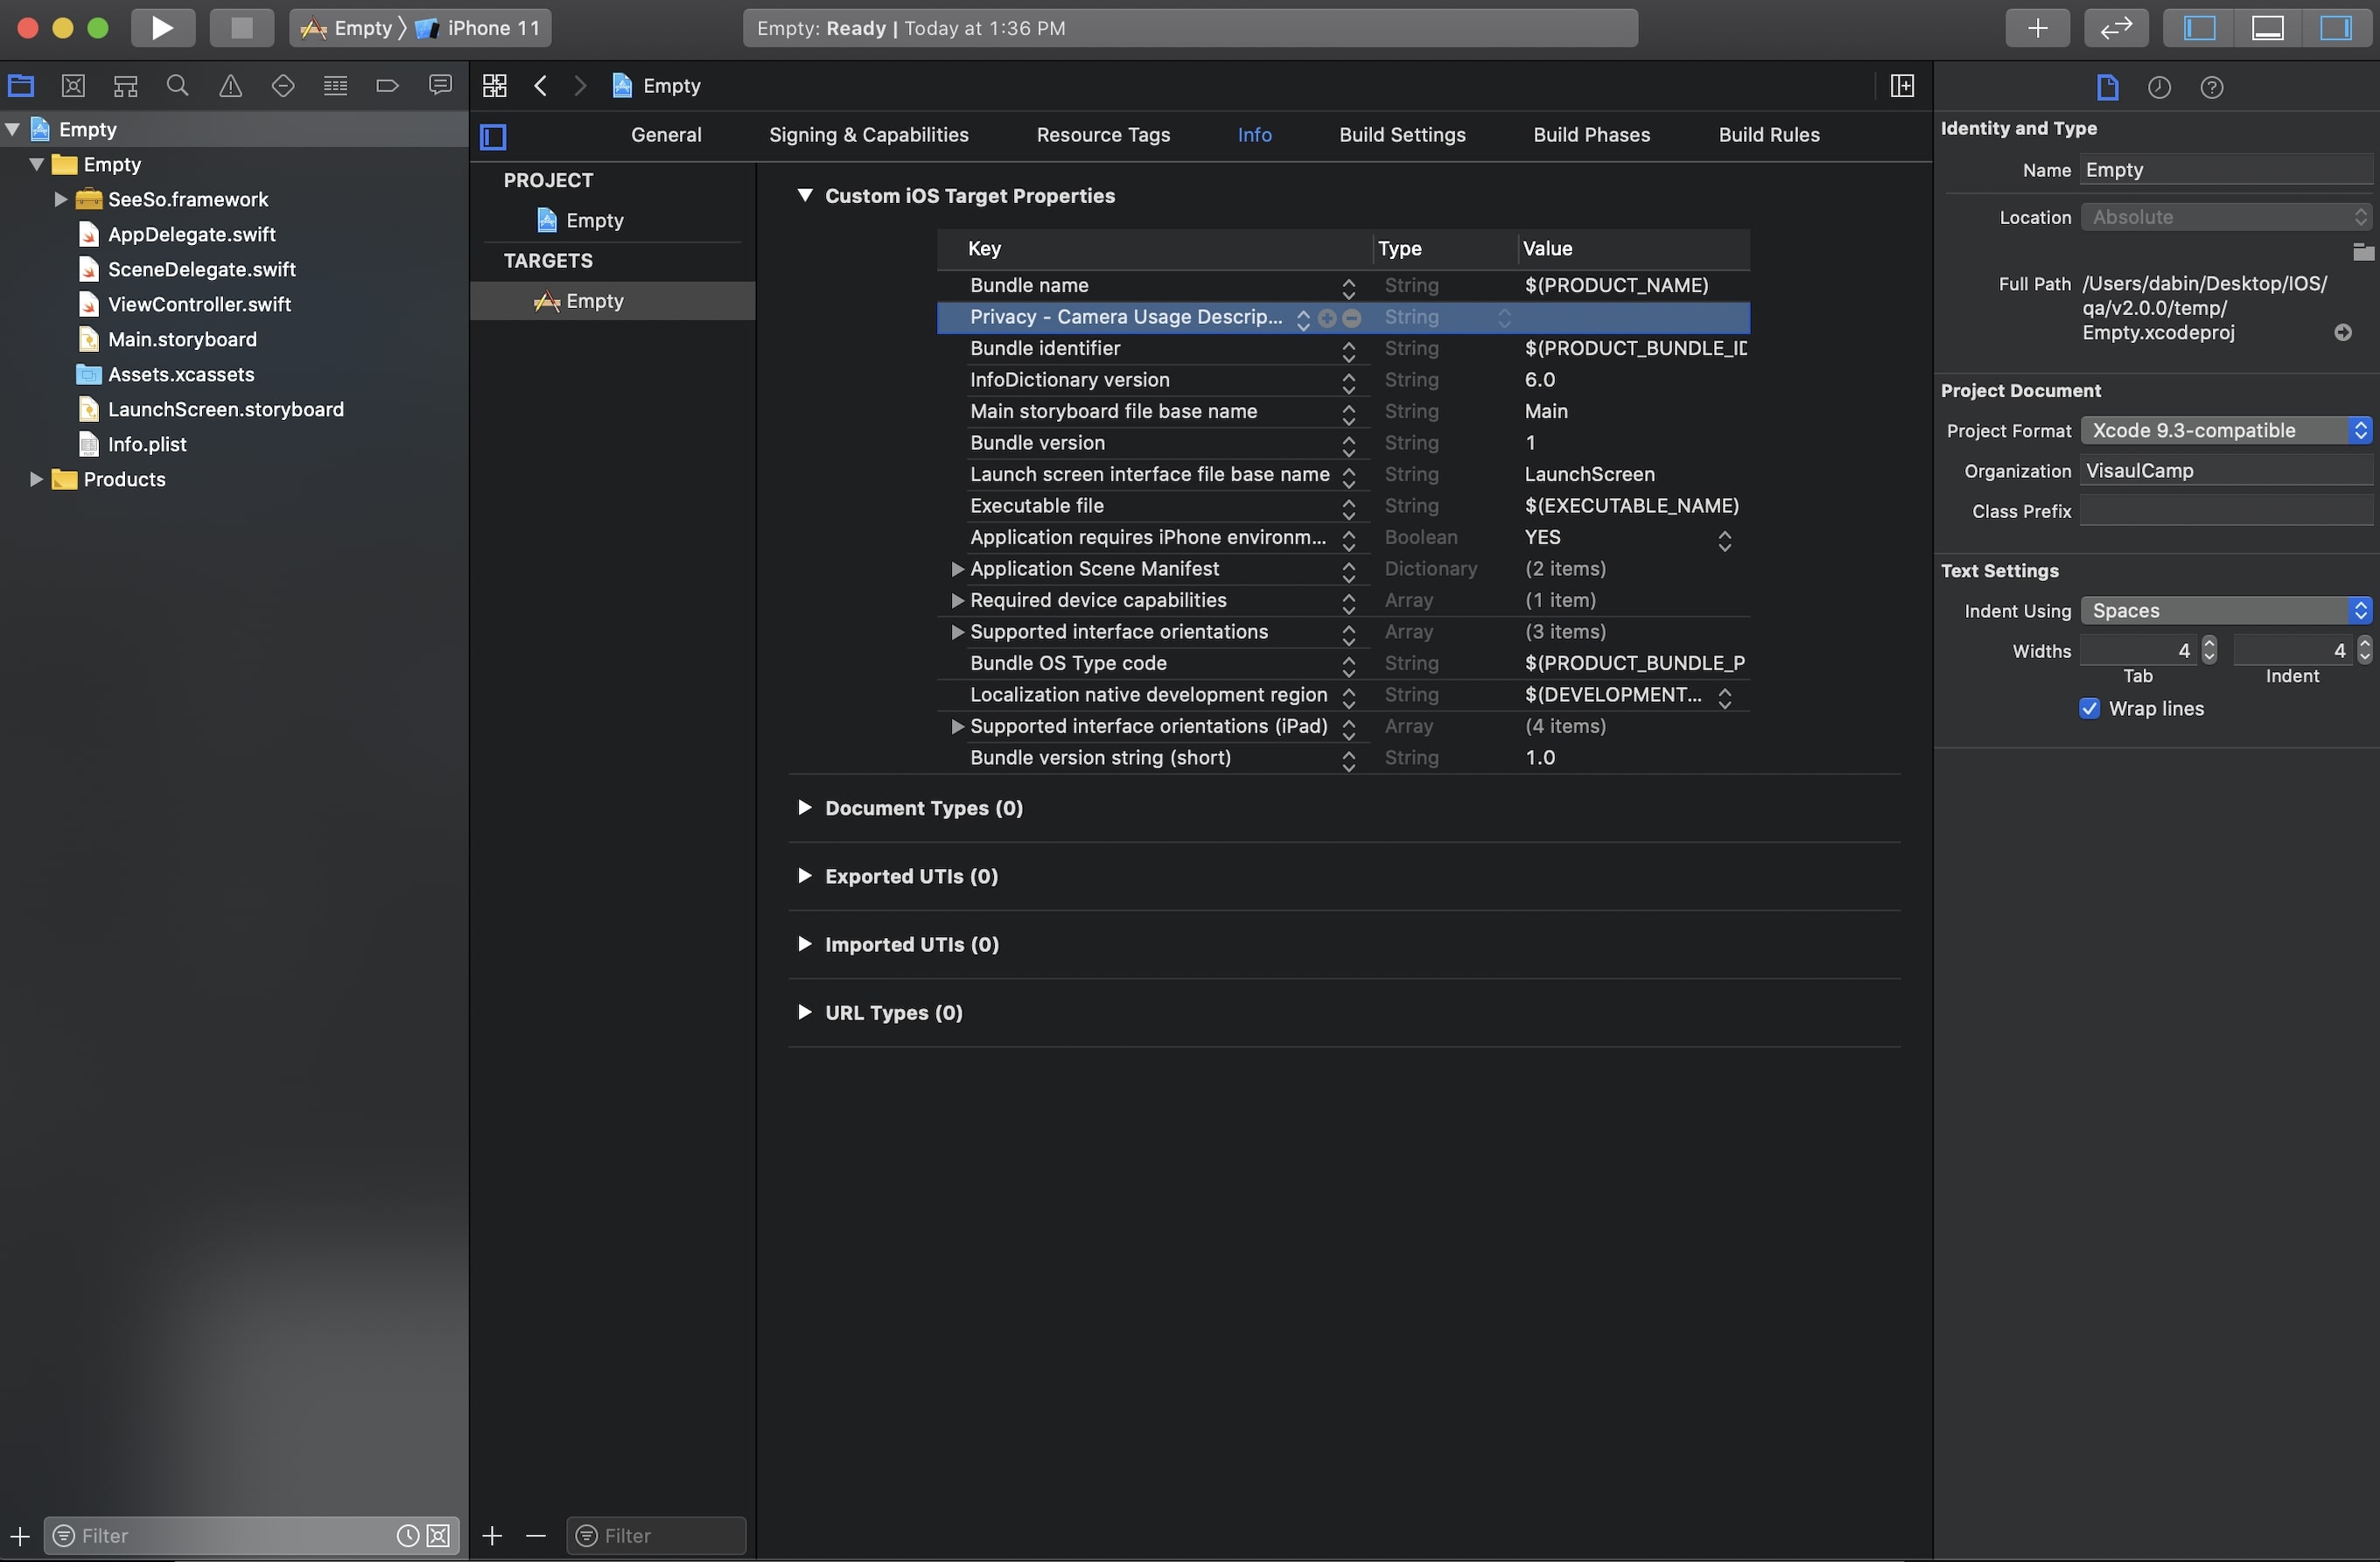
Append the [Privacy - Camera Usage Description] option.
Sample App Implementation
What are we making
This documnet provides a way to create a sample swift application which visualize user's gaze point coordinates with proper UI. (Portrait direction only)
Technical Overview
You will get sample codes to use followings:
Object construction and destruction
startTracking,stopTracking,startCalibration,stopCalibrationFilter toggle
Implementation :
GazeTrackerConstructionimport UIKit
import SeeSo
import AVFoundation
class ViewController: UIViewController {
var tracker : GazeTracker? = nil
override func viewDidLoad() {
super.viewDidLoad()
// Do any additional setup after loading the view.
}
}First, import SeeSo for the
GazeTrackerconstructions. You should define the variable to assign the createdGazeTrackerobject. Please import theAVFoundationto detect the camera permission status.extension ViewController : InitializationDelegate {
func onInitialized(tracker: GazeTracker?, error: InitializationError) {
if (tracker != nil){
self.tracker = tracker
print("initalized GazeTracker")
}else{
print("init failed : \(error.description)")
}
}
}Define the
InitializationDelegateimplementation onViewController. Because theGazeTrackerobject will be relayed fromInitalizationDelegat.onInitalized, it should be defined as above. When theGazeTrackerconstruction is finished, print log to console.// `True` when the camera persimmion exists
if AVCaptureDevice .authorizationStatus(for: .video) == .authorized {
// Run initGazeTracker when the permission exists.
}else{
// Reqeust camera permission to user.
AVCaptureDevice.requestAccess(for: .video, completionHandler: {
response in
if response {
// Permission allowed.
// Run initGazeTracker here.
}
})
}Due to the
GazeTrackeruses data from the camera, it needs the camera permission. Check if the camera permission exists, request the permission if it doesn't.override func viewDidLoad() {
super.viewDidLoad()
if AVCaptureDevice .authorizationStatus(for: .video) == .authorized {
GazeTracker.initGazeTracker(license: "YOUR_DEVELOPMENT_LICENSE_KEY", delegate: self)
}else{
AVCaptureDevice.requestAccess(for: .video, completionHandler: {
response in
if response {
GazeTracker.initGazeTracker(license: "YOUR_DEVELOPMENT_LICENSE_KEY", delegate: self)
}
})
}
}Implement the
GazeTrackerconstructing codes. You MUST replace thelicense keyto the key that you generated from the SeeSo Console.
Start Tracking
extension ViewController : StatusDelegate {
func onStarted() {
print("tracker starts tracking.")
}
func onStopped(error: StatusError) {
print("stop error : \(error.description)")
}
}Implement
StatusDelegateto check if the gaze tracking is started whenGazeTracker.startTrackingfunction is called.extension ViewController : InitializationDelegate {
func onInitialized(tracker: GazeTracker?, error: InitializationError) {
if (tracker != nil){
self.tracker = tracker
print("initalized GazeTracker")
self.tracker?.statusDelegate = self
self.tracker?.startTracking()
}else{
print("init failed : \(error.description)")
}
}
}Connect the
StatusDelegateimplementation to theGazeTrackerobject, then callstartTracking.Log the gaze data
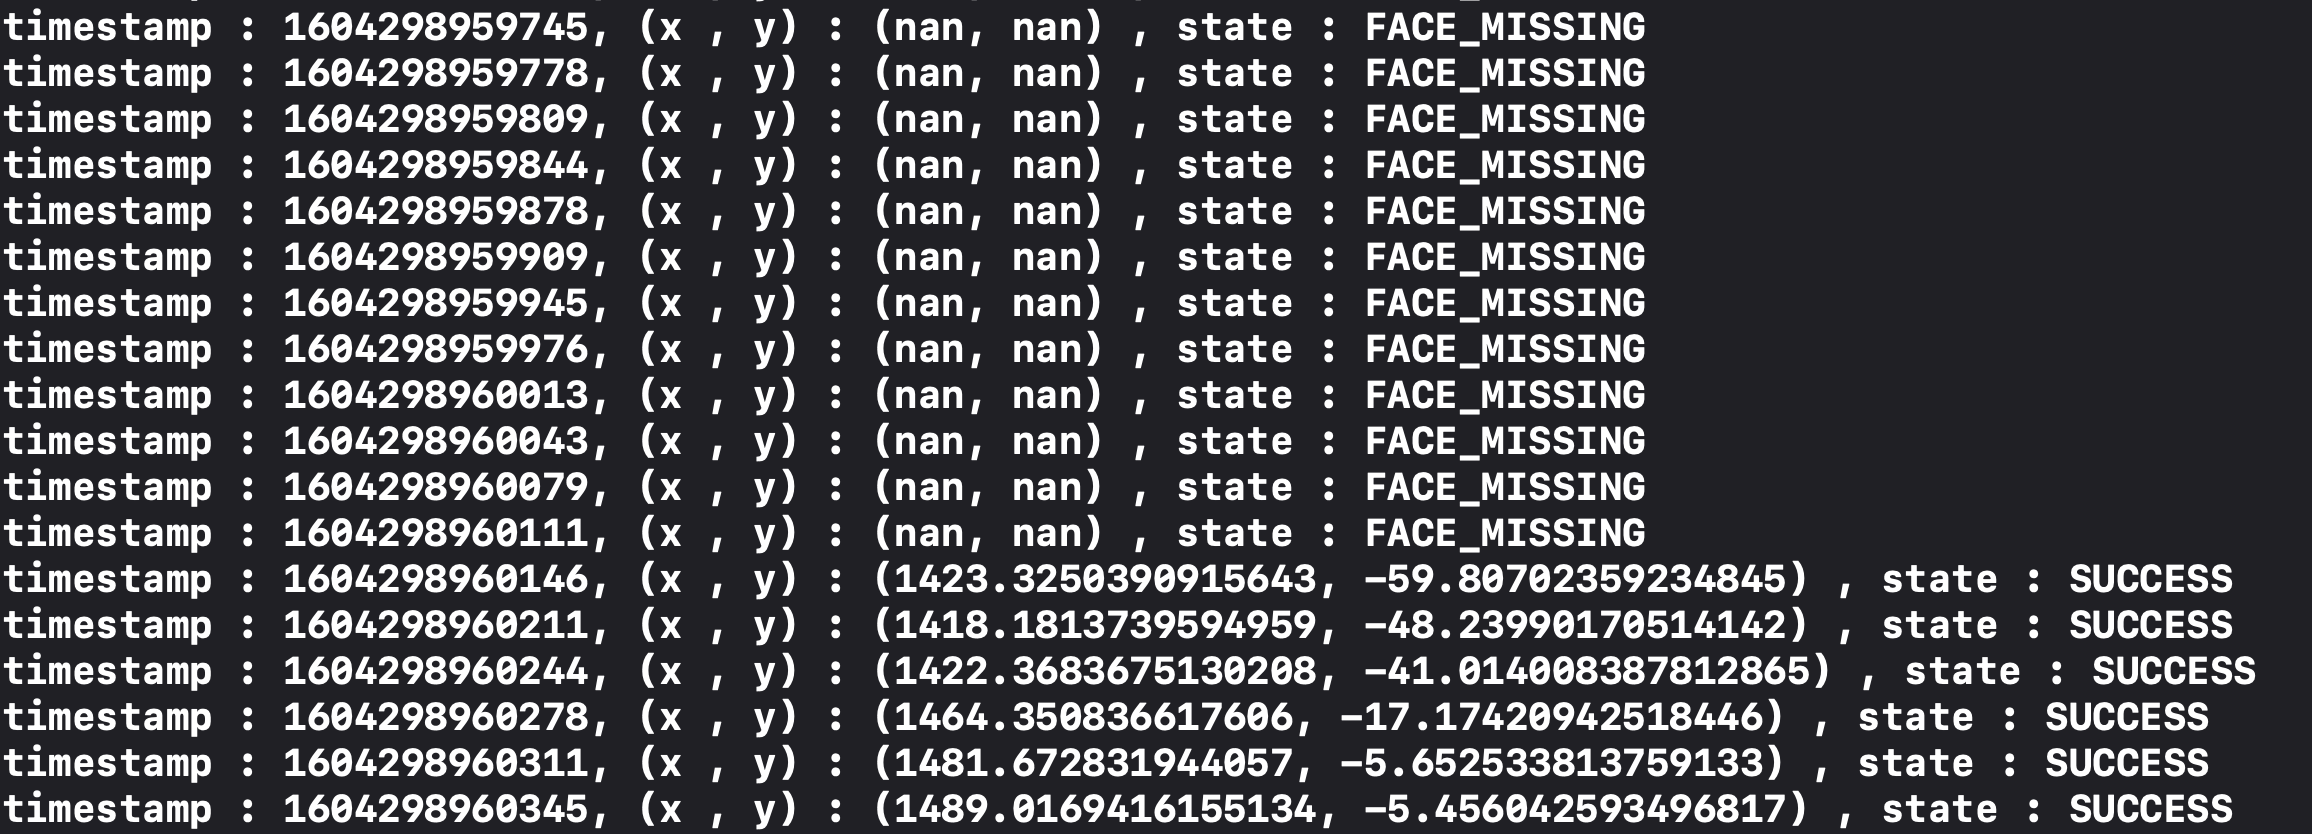
extension ViewController : GazeDelegate {
func onGaze(gazeInfo : GazeInfo) {
print("timestamp : \(gazeInfo.timestamp), (x , y) : (\(gazeInfo.x), \(gazeInfo.y)) , state : \(gazeInfo.tracking.description)")
}
}Implement the
GazeDelegate, the delegate provides the gaze data and the eye movement status from theGazeTracker.extension ViewController : InitializationDelegate {
func onInitialized(tracker: GazeTracker?, error: InitializationError) {
if (tracker != nil){
...
self.tracker?.gazeDelegate = self
self.tracker?.startTracking()
}else{
print("init failed : \(error.description)")
}
}
}Connect the implemented
GazeDelegate.
Overall codes
import SeeSo
import UIKit
import AVFoundation
class ViewController: UIViewController {
var tracker : GazeTracker? = nil
override func viewDidLoad() {
        super.viewDidLoad()
        if AVCaptureDevice .authorizationStatus(for: .video) == .authorized {
           GazeTracker.initGazeTracker(license: "YOUR_DEVELOPMENT_LICENSE_KEY", delegate: self)
        }else{
            AVCaptureDevice.requestAccess(for: .video, completionHandler: {
                response in
                if response {
                    GazeTracker.initGazeTracker(license: "YOUR_DEVELOPMENT_LICENSE_KEY", delegate: self)
                }
            })
        }
}
}
extension ViewController : InitializationDelegate {
func onInitialized(tracker: GazeTracker?, error: InitializationError) {
if (tracker != nil){
self.tracker = tracker
print("initalized GazeTracker")
self.tracker?.statusDelegate = self
self.tracker?.gazeDelegate = self
self.tracker?.startTracking()
}else{
print("init failed : \(error.description)")
}
}
}
extension ViewController : StatusDelegate {
    func onStarted() {
        print("tracker starts tracking.")
    }

    func onStopped(error: StatusError) {
       print("stop error : \(error.description)")
    }
}
extension ViewController : GazeDelegate {
func onGaze(gazeInfo : GazeInfo) {
print("timestamp : \(gazeInfo.timestamp), (x , y) : (\(gazeInfo.x), \(gazeInfo.y)) , state : \(gazeInfo.trackingState.description)")
}
}
Run
Build on device
Click the build button on the left-top side.

Feature
- You should allow the camera permission first.
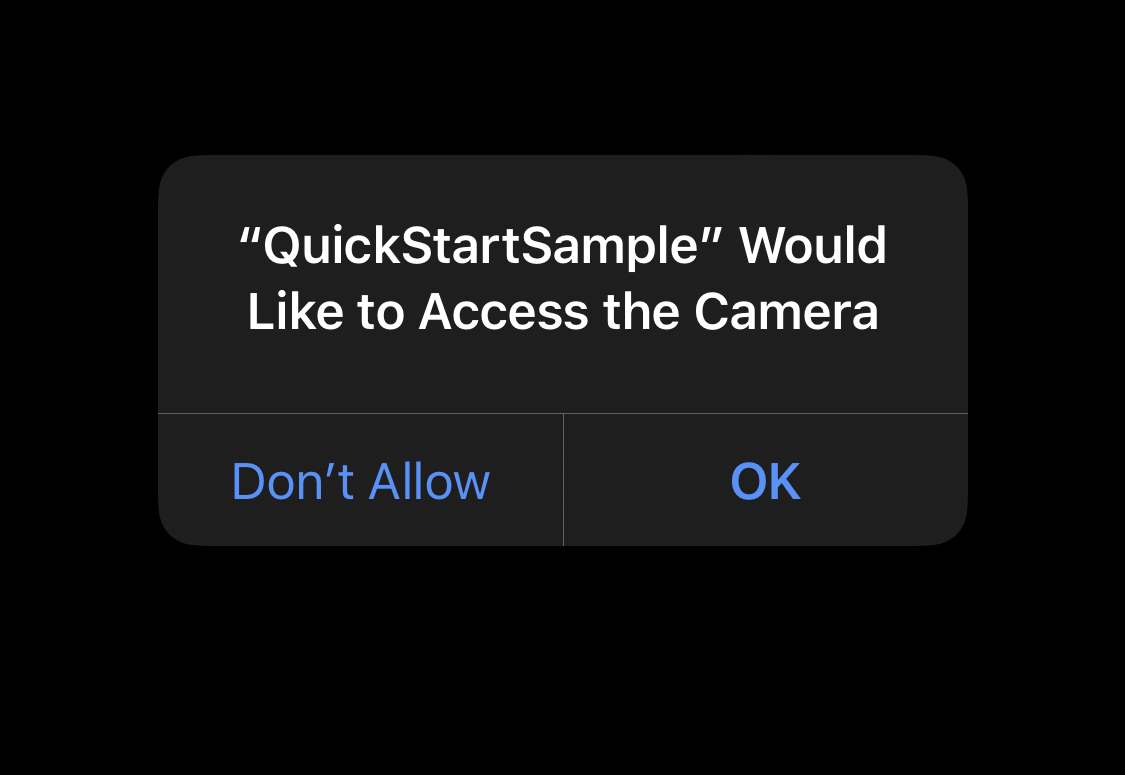
When setup is successful and the camera permission allowed, the data from the
GazeTrackerwill be shown on the console.
As a default, timestamp, gaze point data, and tracking state will be logged. The state will be
TRACKINGwhen SDK can detect a face,FACE_MISSINGwhen doesn't.